In this blog post I will be sharing and reflecting on my experience creating an educational video.
The main purpose / learning objective of my video was how to make an aesthetic bed. I chose this topic because anyone can make a bed, but not everyone knows how to make it aesthetically pleasing – challenging the simple ‘toss a pillow and blanket’ approach.
Video was an excellent medium for this learning objective because it not only visually captured each step, but it also allowed viewers to understand the fluid motions that went along with each step.
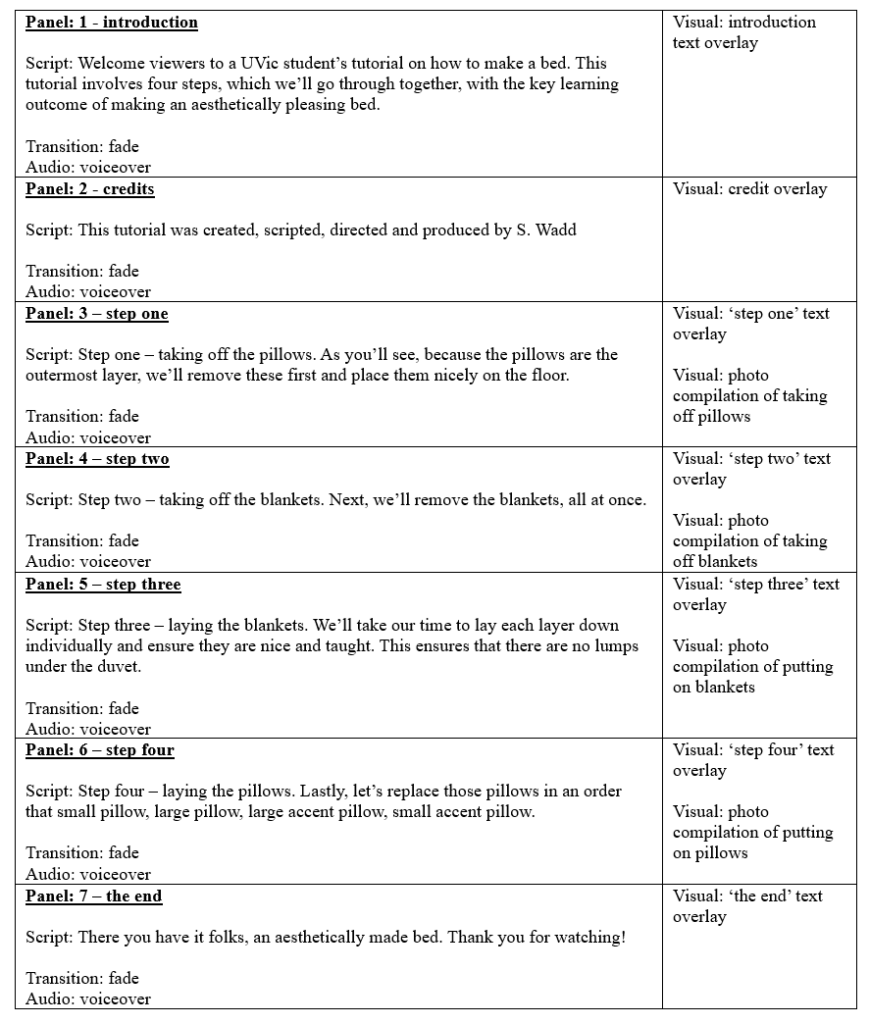
I began this process by creating a script and storyboard to guide the curation of the tutorial (imaged below). This was very helpful as it allowed me to follow a cohesive and clear vision all throughout the project.
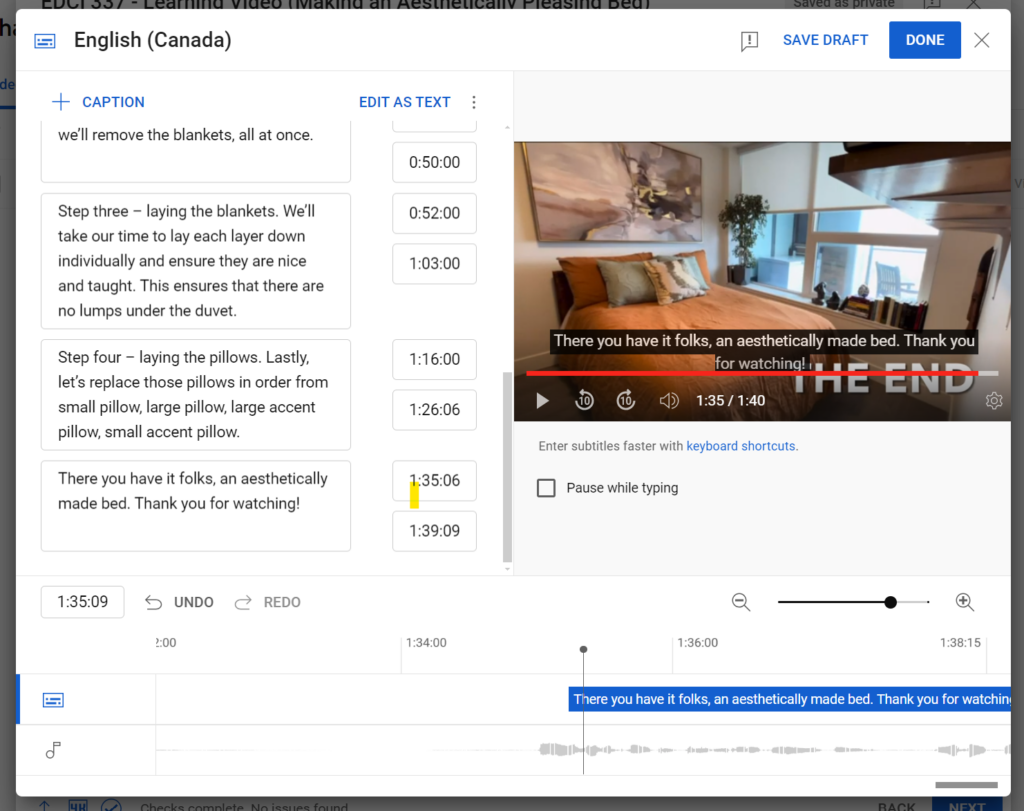
This tutorial focused on applying Mayer’s cognitive theory of multimedia learning in the following ways: dual coding theory by combining visual stimulation with auditory stimulation (I opted to make the props, i.e., blankets and pillows, in the video look like they were moving by themselves, because I think this adds engagement by doing something out of the ordinary, while keeping the visuals simple and straightforward); redundancy principle by not adding unnecessary text to what is already narrated to avoid adding extraneous load (as you can see in the video, I kept the phrases very simple and all encompassing, like “step two – remove the blankets”, so viewers could easily retain the core steps); coherence principle by keeping the content in line with the learning objective; and the contiguity principles by overlaying all of the text on top of freeze frames, rather than splitting them up with title scenes. I also followed universal design principles by ensuring that the text was large and clear for all to see, sticking with white text color to reduce any busyness that could clutter the visuals and overwhelm or distract individuals who are neurodivergent, and uploading my video to Youtube so that viewers have the option of using closed captions (see screen capture below of adding closed captions to the video, made easy by already having a script and storyboard).
The easiest part of this process was recording the actual footage. I took one long video, slowly moving objects then standing out of the frame, then I took screenshots of the frames that excluded me to give a fun ‘animated’ feel. The most difficult aspect of this process was first setting up the camera to have hands-free recording. I figured out how to prop up my phone using a tripod, but it was definitely a challenge. I also had a hard time figuring out how to incorporate music, but found the solution after trial and error.
If there is anything I would do differently next time, it would be to add a clip that encourages further learning, like “now go try it out on your own and see how you do. Also, have fun with it, beauty is in the eye of the beholder”.
Link to my video tutorial: https://youtu.be/6TH7Y7gWdPw
/
I hope you enjoy watching – if you do, please feel free to leave a comment below!